 |
|||||||||||||
 |
|||||||||||||
Instructions: Page 14
Choosing your Style Sheet
Once all of the content has been added to your ePortfolio and you have saved all of your changes, you can finally start implementing some style changes. Since the template uses Style Sheets to implement style information, you need to change the Style Sheet to change the overall look of the ePortfolio. First, you have to download some more packages. So, go back to the style sheets page and get some, when you’re ready, open up Nvu and just follow these instructions.
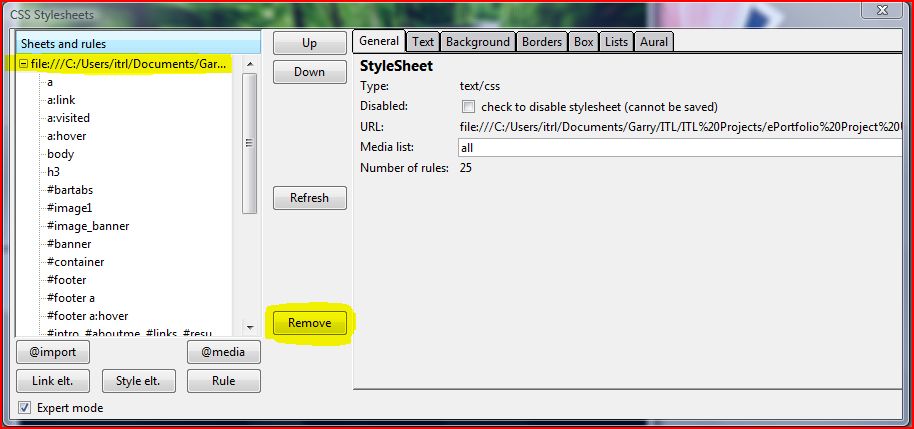
- Click Tools, and then click CSS Editor.
- Select the first item in the list on the left (the old style sheet) and then click Remove. You’ll notice that the style of your page is completely gone as soon as you click Remove. Don’t panic, that’s normal.
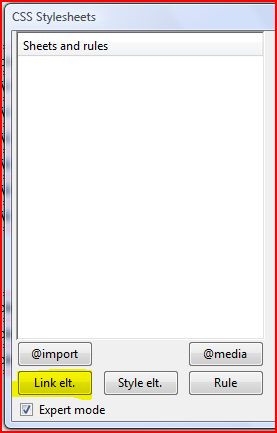
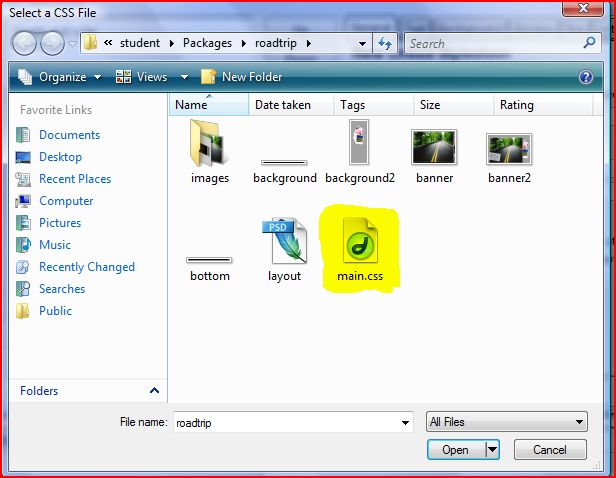
- Next, you should click the Link elt. button, then the Choose File button. From there, open the package folder that you want to use and click the file that ends in .css in the folder of the package that you wish to use and click Open. Usually, it will be named main.css. Don’t worry about what the icon looks like; it’ll be different from computer to computer. As long as the file ends in .css you’re fine.
- After this, click the Create Stylesheet button. And then click Close
- Now, you have to repeat steps 1-4 for each page of your ePortfolio. Unfortunately, there is no quick fix to do this automatically for every page.
Take a look at the differences in color and style now that you have loaded a new Style Sheet! Try loading some of the other Style Sheets until you find one that you want to use with your ePortfolio. Once you find the Style Sheet that you want, you should make sure that ALL of your ePortfolio pages are linked to it. To do this, make sure that you make all of the previous Style Sheet changes to each of the html files in your ePortfolio folder.
| Page | 11 | 12 | 13 | 14 | 15 |