Instructions: Page 15
Part 3: Loading your ePortfolio to your Web space
Once you have added your content and selected a Style Sheet for your ePortolio, you will need to load your html pages to your Web space. If you followed the procedure in Part 1, you should now have your own Web space on the University server. This section will demonstrate how to load your ePortfolio onto that Web space so that it can be viewed online. To begin:
- Click on START at the bottom left of the screen.
- Select All Programs and find the folder called University of Alberta 2004.
- Select WinSCP to open the program that you downloaded in Part 1.
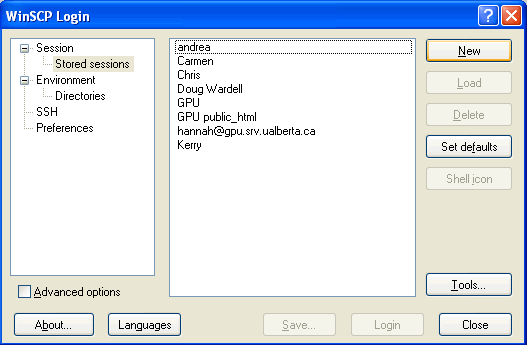
- When the window opens, click on New to create a new account.
- Under Host Name, enter gpu.srv.ualberta.ca.
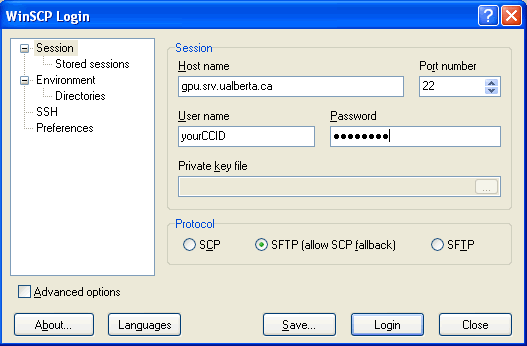
- Make sure that the Port number is left at 22.
- Login with your Campus Computing ID in the User name and password sections.
- Make sure that the SFTP(allow SCP fallback) button is selected.
- Click on Login at the bottom of the screen.
Once the WinSCP session opens, you should save your login information so that you do not have to enter it again:
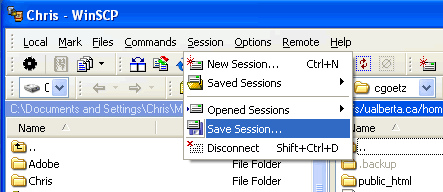
- Click on the Session menu at the top of the screen.
- Select Save Session.
- Enter your name under Save session as:
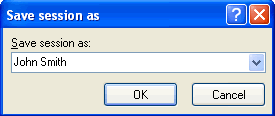
This will allow you to quickly and easily access your Web space without having to enter your CCID and password every time.
Now that you have logged in, your own personal WinSCP window containing two frames should be open. The frame on the left represents the files on your hard drive and the frame on the right represents the files in your Web space.
On the right side of the screen:
- Make sure that you double click and open the folder called public_html.
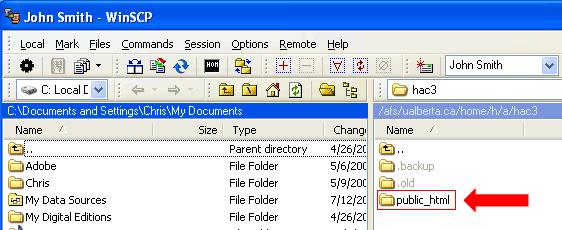
- Any files that you transfer to your Web space MUST be placed into this folder or they will not be viewable on the Web.
On the left side of the screen:
- Browse for your ePortfolio folder. If you have followed these instructions, it should be located on your desktop and should contain all of your html files, documents, and images.
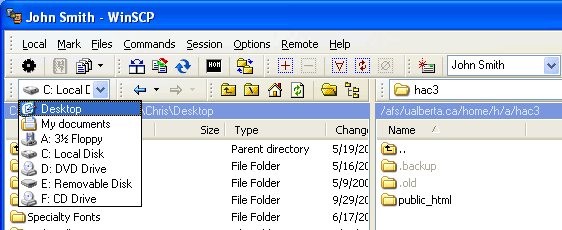
- Click on the ePortfolio folder and DRAG it to the right side of the WinSCP window into the public_html folder.
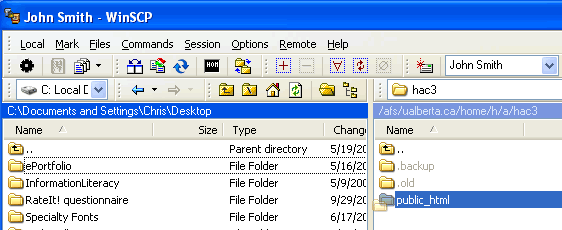
- A pop-up window will open for you to verify the location of the file transfer; all that you have to do is click on Copy.

- This will transfer your entire ePortfolio folder an all of its contents to your Web space.
Now that you have created and posted your files, all that you have to do is check out your new ePortfolio! To access the html files online, simply type in the URL of your directory:
- Open a browser window (ie. Internet Explorer, Firefox, Safari).
- Type in the URL of your Web space:
http://www.ualberta.ca/~YOURCCID/
For example, my name is Christopher Goetz, and my CCID is cgoetz. This means that the URL to MY Web space is:
http://www.ualberta.ca/~cgoetz/
If you enter your own URL into your browser, it should take you to your Web space directory where you can see your ePortfolio folder. When you click on it, the index page of your ePortfolio will automatically load! Take a look at the URL – this is the new link for your very own personal ePortfolio! If you have followed these instructions, the URL for your eportfolio should be http://www.ualberta.ca/~YOURCCID/eportfolio. This is the link that you can add to resumes, share with friends and family, and forward to potential supervisors and employers! You’ve done all of the work to make it happen, now go ahead and take the world in your hands.
| Page | 11 | 12 | 13 | 14 | 15 |


