
 |
|||||||||||||
 |
|||||||||||||
Instructions: Page 10
Adding your own pictures and files
Before you can add your own pictures and documents to your Web pages, you need to transfer the files to their corresponding folders within your ePortfolio folder. By copying all of the files into your ePortfolio folder, you will ensure that all of your documents and images will remain intact when you put your ePortfolio on your Web space.
- Go to your desktop and open your ePortfolio folder.
- To save images, open the Images folder. Copy any images that you intend to use into this folder.
- To save documents, open the Documents folder. Copy any documents (ie. writing samples, pdf versions of your resume, photocopied scholarships, electronic CV′s etc) into this folder.
Once you have an image saved in your Images folder, you can actually add the image to your Web page. Since we have the index page open in First Page, let′s try to replace the image of Don Corleone with one of your own images:
- In Nvu, with the index page open, click on the image of Don Corleone.
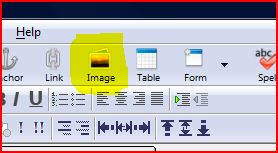
- Without clicking anywhere else, click the Image button.
- Notice that the Image Location field says the name of the file you currently have. To change this, click Choose File.

- Browse for the image you want to place on the page. It should be inside of the Images folder in your ePortfolio folder on the Desktop. Select and image and then Click Open.
- The next screen will now allow you to change many properties of the image. Go through the tabs and see if you need to change any of these options. Click OK when you're ready.


| Page | 1 | 2 | 3 | 4 | 5 | 6 | 7 | 8 | 9 | 10 |