Page 5
Step #2 continued
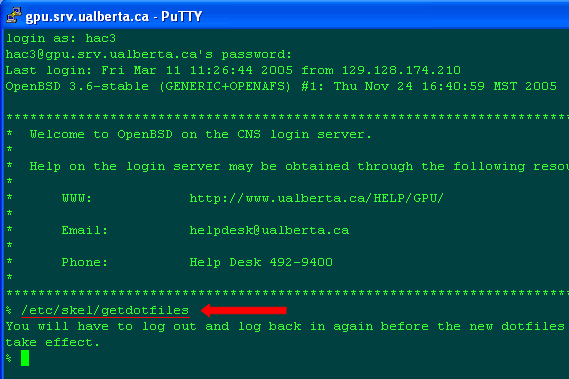
Now you need to enter a few commands to set up your Web space on the University server. Be sure that you enter the commands EXACTLY as you see them printed here (including spaces between letters and words!) and press the "Enter" key after each line.
- First, type in the following command:
/etc/skel/getdotfiles

- Press Enter.
- Log out of PuTTY by closing the window and quitting the program.
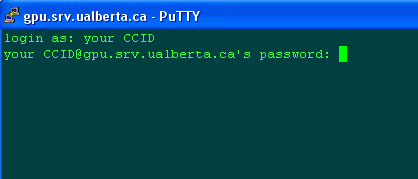
- Open PuTTY and login again.
- Once the PuTTY window opens, enter your CCID and password again.

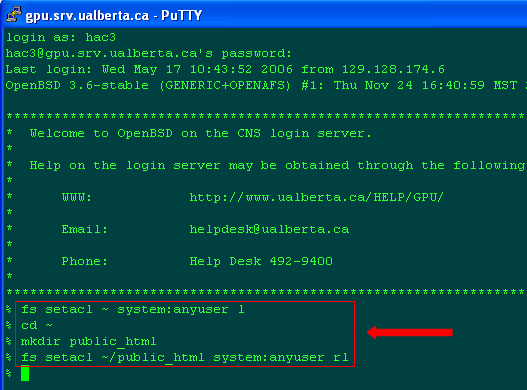
You will now need to type in some more commands. Be sure to TYPE them in exactly as they are written (cut and paste will NOT work!).
- Please note that every "l" in these lines is a lower case L.
- Be sure to press the Enter key after each line!
fs setacl ~ system:anyuser l
cd ~
mkdir public_html
fs setacl ~/public_html system:anyuser rl

After this is complete, you can close the Putty session. Congratulations – you have activated your Web space on the University server!
Step #3: Adding files to your Web space
You can now load files to your web space using the WinSCP program. This entire process is explained in detail in Part 3 of this tutorial.
| Page | 1 | 2 | 3 | 4 | 5 | 6 | 7 | 8 | 9 | 10 |


